Cebu is one of those places that completely steals your heart, with turquoise water, friendly locals and once‑in‑a‑lifetime adventures that make you say “wow” every single day. If you’re planning a Cebu itinerary 4 days focused on Southern Cebu, this guide covers Oslob’s famous whale sharks, Tumalog Falls, Sumilon Island, Kawasan canyoneering in Badian and Moalboal’s sardine run and sea turtles. It’s the perfect mix of adventure and relaxation, ideal for first‑time travellers who want to see the best of Southern Cebu without rushing.
Here’s exactly how my 4 days in Cebu went, with real costs, timings, and honest reviews to help you plan your own 4-day, 3-night Cebu itinerary stress‑free.
Table of contents
- Cebu Itinerary 4 Days: Southern Cebu Overview
- Day 1 – Cebu City to Oslob (Start of Your 4D3N Cebu Itinerary)
- Day 2 – Oslob whale sharks, Tumalog Falls & Sumilon Island
- Oslob whale shark watching: what to expect
- Is whale shark watching in Oslob ethical?
- Ready to book your whale shark tour? Check options here:
- Breakfast back at AJ’s Place
- Tumalog Falls quick guide (when open)
- Sumilon Island sandbar and snorkelling
- Lunch in Oslob
- Transfer from Oslob to Moalboal
- Dinner at Ven’z Kitchen
- Day 3 – Kawasan Canyoneering & Moalboal Sardine Run
- Day 4 – Moalboal to Cebu City / Mactan Airport
- Cebu Itinerary 4 Days: Costs, packing list & travel Tips
- Best time to visit Southern Cebu
- FAQs
Cebu Itinerary 4 Days: Southern Cebu Overview
What this 4 days in Cebu itinerary covers (Oslob, Sumilon, Kawasan, Moalboal)
- Day 1: Manila/elsewhere → Cebu City → bus to Oslob, stay near whale shark site
- Day 2: Oslob whale shark watching → Tumalog Falls (when open) → Sumilon Island → private transfer to Moalboal
- Day 3: Kawasan Falls canyoneering → Moalboal sardine run and turtles
- Day 4: Early transfer from Moalboal back to Cebu City / Mactan Airport
Day 1 – Cebu City to Oslob (Start of Your 4D3N Cebu Itinerary)
If you’re starting this Cebu itinerary from Manila, flights to Cebu (Mactan‑Cebu International Airport) are frequent, with several departures every hour on airlines like Cebu Pacific, Philippine Airlines and AirAsia. My flight from Manila to Cebu took around 1 hour 35 minutes (09:20 Flight: Manila → Cebu (1h 35m).
💡 Travel Tip: If you’re flying out of NAIA Terminal 4 or 3, arrive at least 2 hours before your flight. Check-in queues can get long, especially in the morning, and terminal changes sometimes happen without much notice.
How to get from Cebu City to Oslob
Once you land in Cebu, follow the signs for buses and taxis into Cebu City. The airport bus to SM City Cebu is convenient and costs around ₱240, taking about 45 – 60 minutes depending on traffic. SM City Cebu is a huge mall and an easy place to grab lunch, pick up last‑minute SIM cards or snacks and cool off in the air‑con before heading further south.
We spent about 2 hours at SM Cebu for lunch and a quick wander, then made our way to the South Bus Terminal for the bus to Oslob. Buses to Oslob run regularly; the journey takes around 4–5 hours and costs roughly ₱350–₱450 depending on whether you choose a regular or deluxe bus.
Where to stay near the Oslob whale shark area
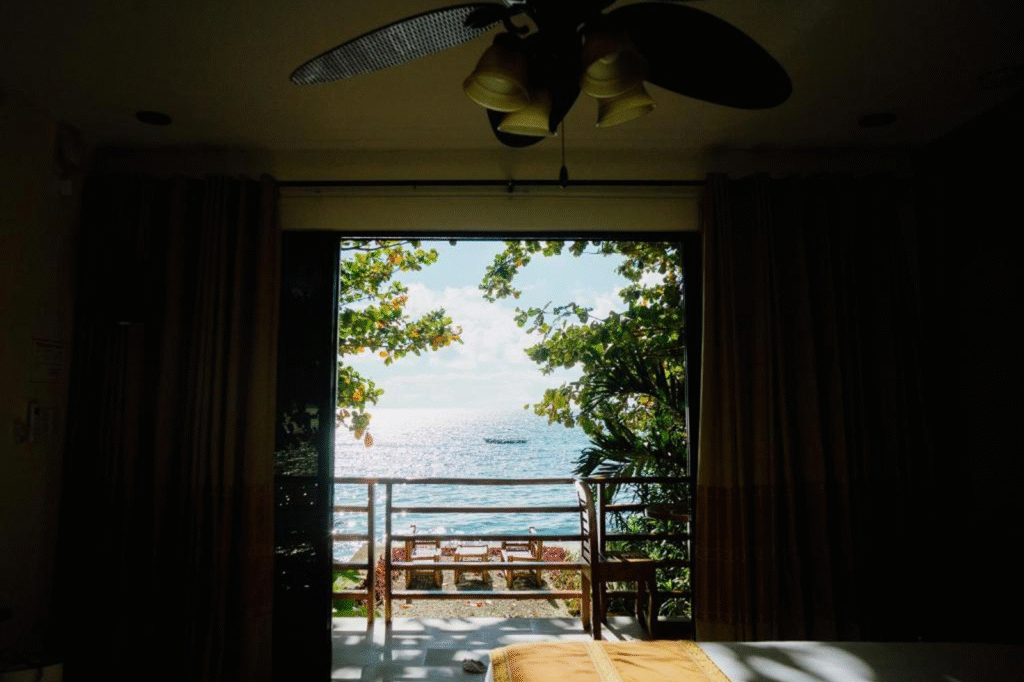
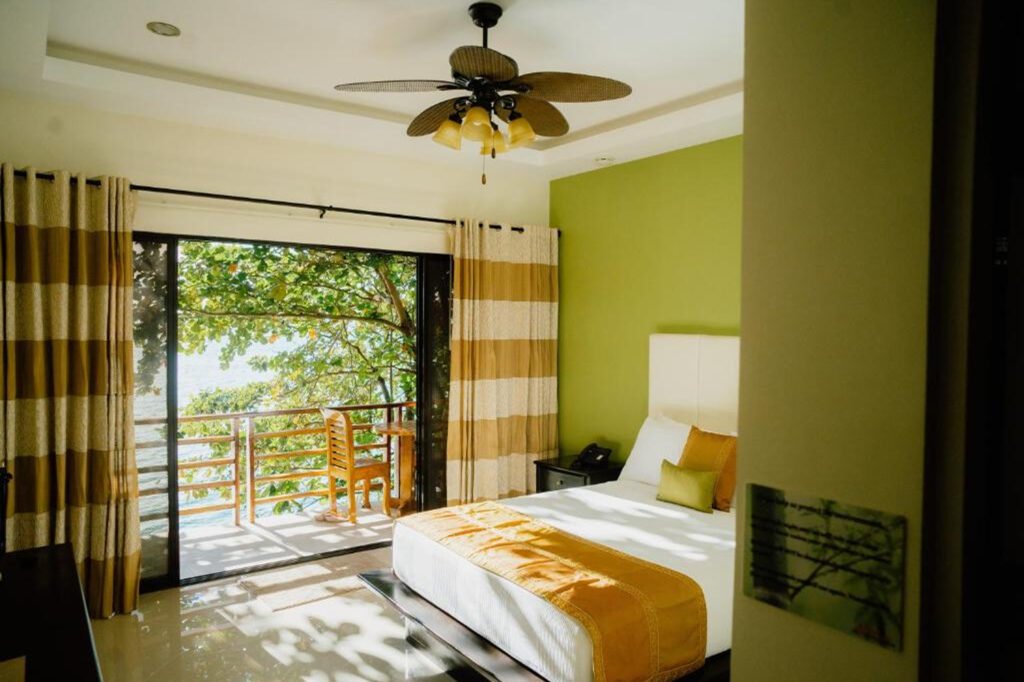
We arrived in Oslob in the early evening and checked into AJ’s Place, a cosy seaside guesthouse just a 3‑minute walk from the whale shark watching site. Check‑in was easy, the staff were friendly and we left a ₱1000 deposit. We stayed in Room 2, a seaview room with a comfy bed and balcony overlooking the water – perfect for an early start the next morning.
After a long travel day, we kept things simple and grabbed local BBQ skewers from a nearby street stall. Oslob is much quieter than Moalboal, so expect peaceful evenings rather than nightlife.
Day 2 – Oslob whale sharks, Tumalog Falls & Sumilon Island
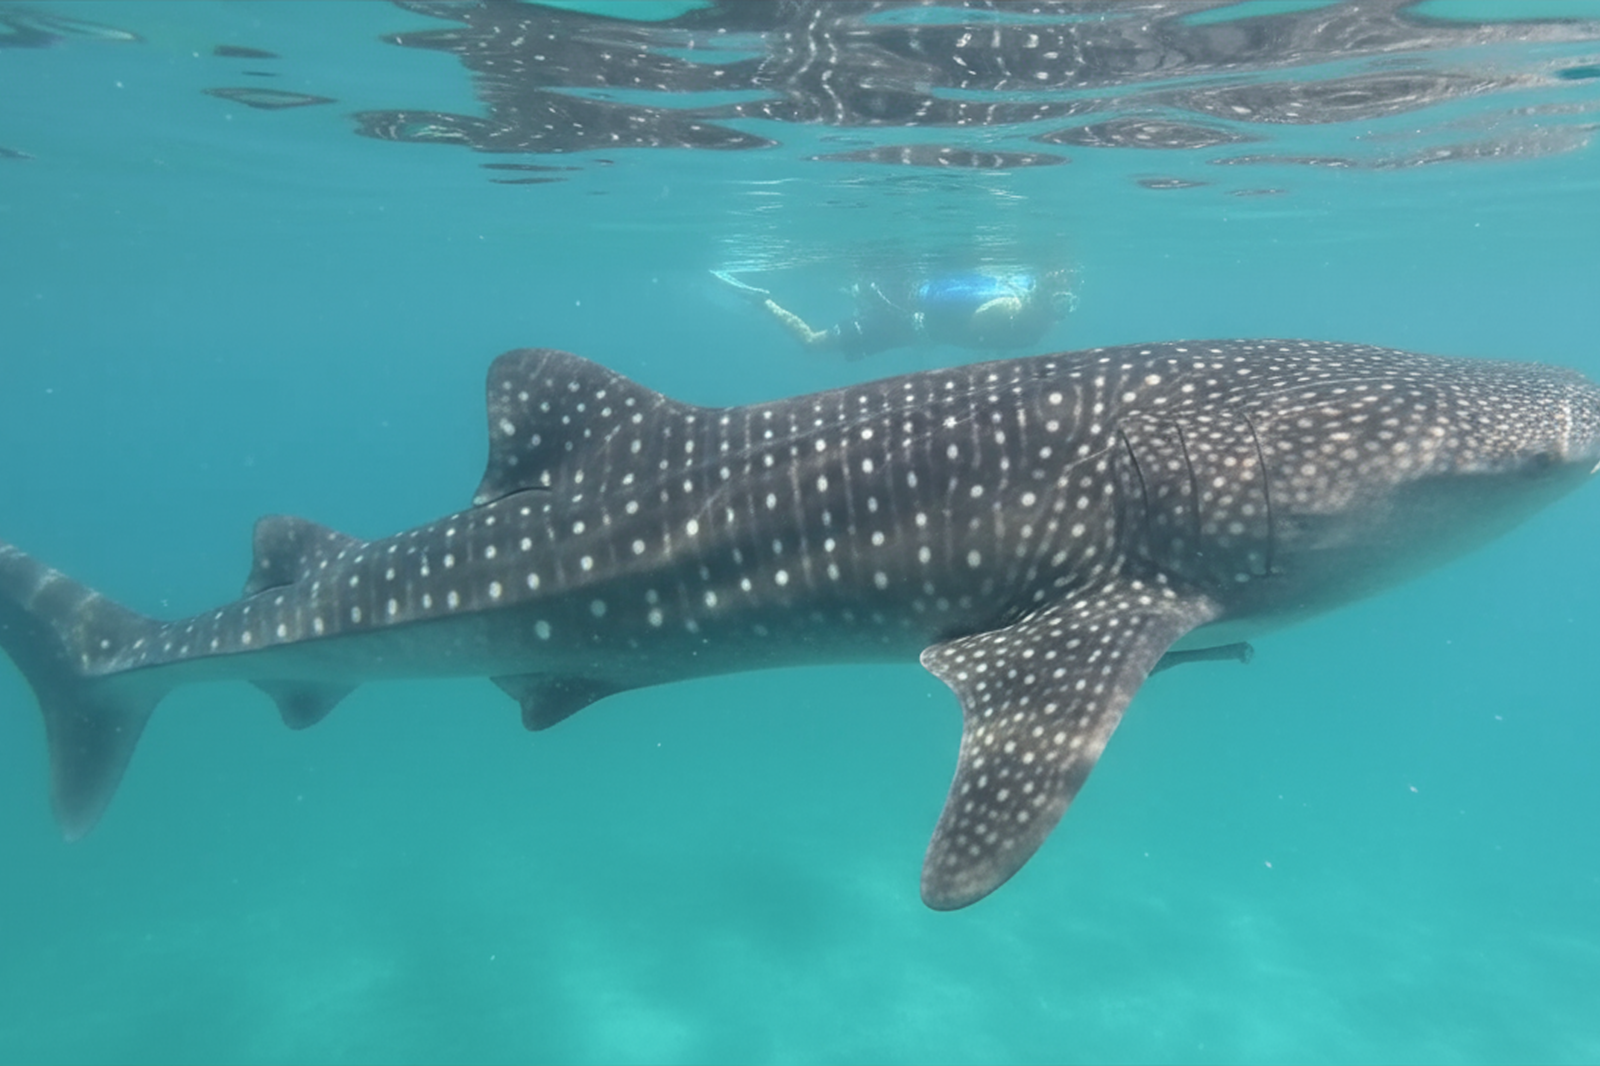
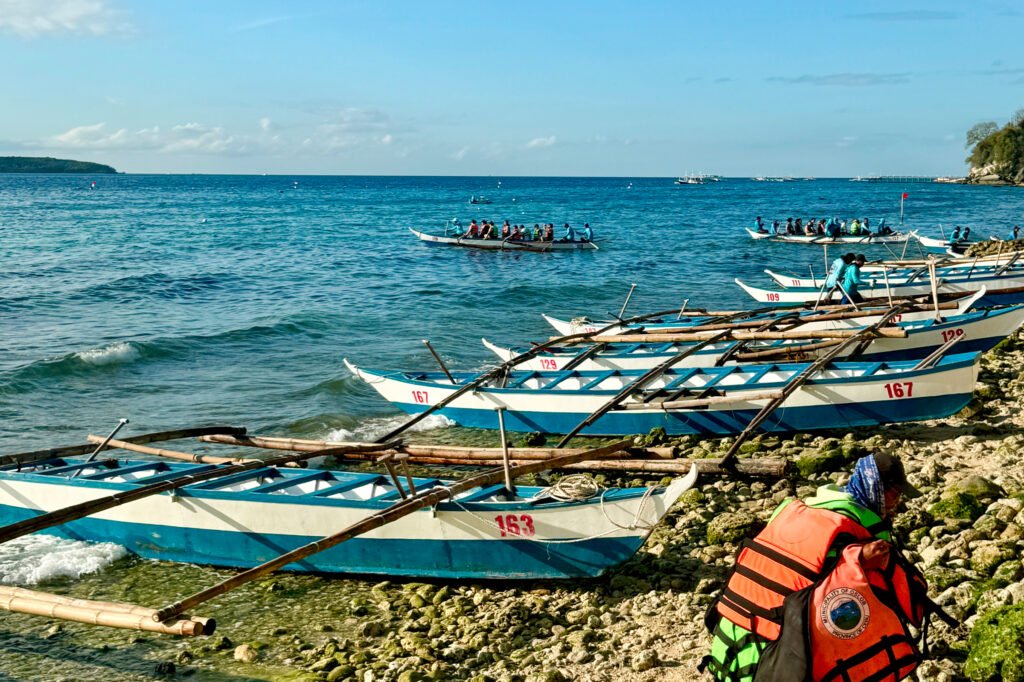
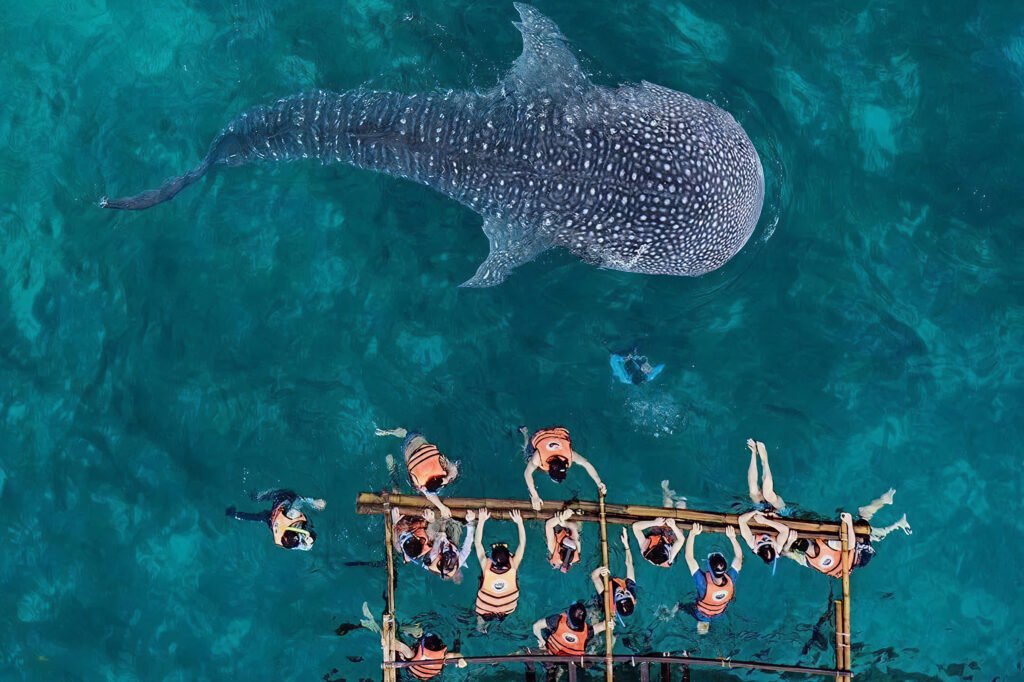
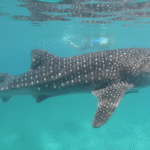
We woke up around 6:00 AM, and as soon as we stepped outside AJ’s Place, we could already see the bangkas (small boats) lining up along the shore for the whale shark tours. It’s only a short walk from most guesthouses in this area to the whale shark briefing and boarding zone.

Oslob whale shark watching: what to expect
We didn’t book anything in advance and simply turned up at the site, as tickets are easy to buy on the spot. This approach worked well for us and gave more flexibility with timing. We paid about ₱500 per person, which included a life jacket and around 30 minutes in the water.
You don’t really need a guide here, so it’s a good way to save a bit of money, but do keep in mind that the earlier you arrive, the better – the site opens around 4:00 AM and queues build quickly after sunrise. Some travellers start lining up while it’s still dark to be on the first boats out.
Despite the early start, being just a few feet away from these gentle giants is an incredible moment you won’t forget.
💡 Travel tips for Oslob whale sharks
Arrive early: The site opens at 4 AM, and crowds build up quickly after sunrise.
Bring cash: Entrance, rentals and breakfast stalls are usually cash‑only.
Follow the rules: Keep a safe distance from the whale sharks, touching them is strictly prohibited.
Don’t overpack: You’ll leave your belongings in lockers or on the boat while you swim.
Use reef-safe sunscreen: Protect both your skin and the marine life.

Is whale shark watching in Oslob ethical?
While swimming with whale sharks in Oslob is on many travellers’ bucket lists, it’s important to understand the ethical concerns. Here, whale sharks are hand‑fed daily to keep them close to shore, which can change their natural behaviour and migration patterns. The area also gets very crowded, with multiple boats and groups surrounding the animals at once, increasing the risk of stress and accidental injuries.
If you’d prefer a more responsible whale shark experience in the Philippines, consider places like Donsol in Sorsogon or certain spots in Bohol, where sightings are natural, there’s no feeding and encounters are more strictly regulated. Your chances of seeing whale sharks aren’t guaranteed, but it’s a more ethical way to observe them in the wild.
Ready to book your whale shark tour? Check options here:
Klook.comBreakfast back at AJ’s Place
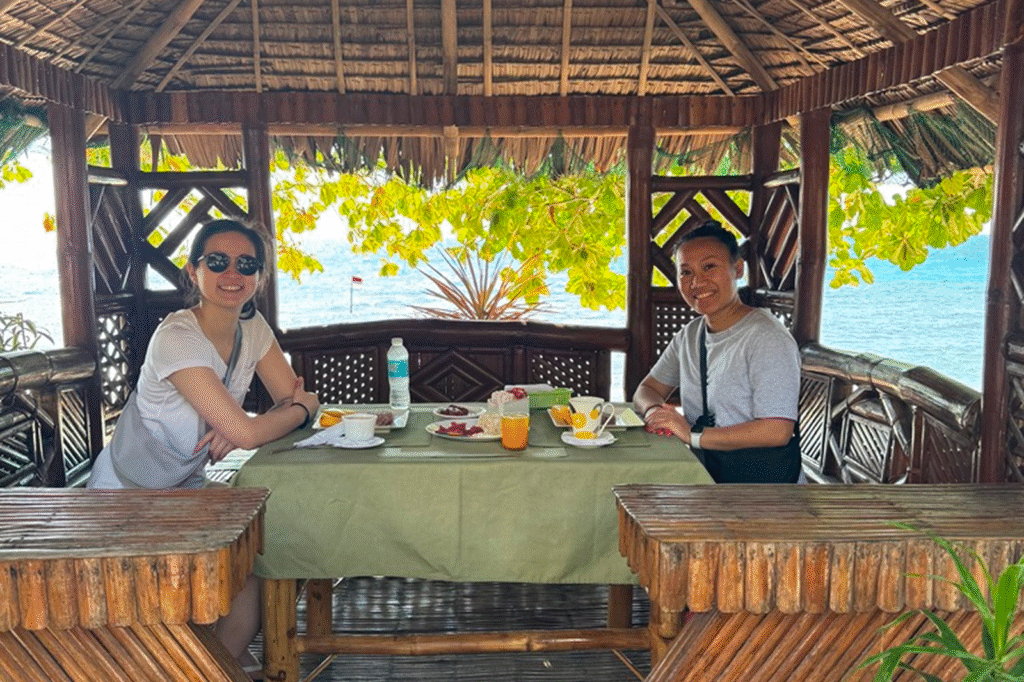
After our whale shark experience, we walked back to AJ’s Place for breakfast. Our complimentary meal was mango sticky rice plus tocino and longanisa, served in one of the huts overlooking the sea – the perfect way to refuel and take in the views.
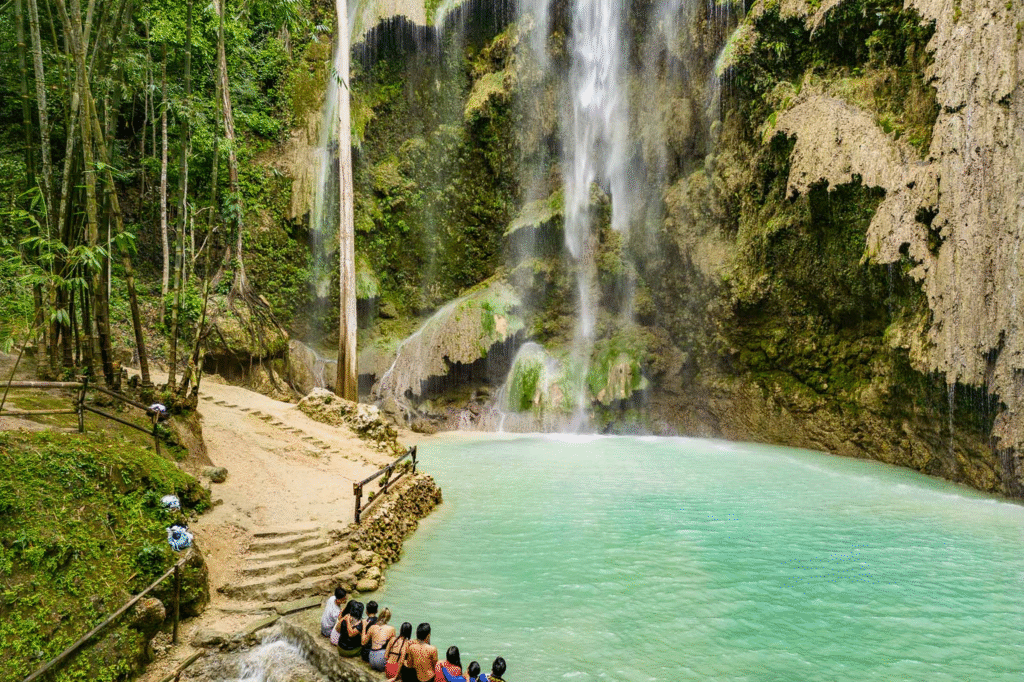
Tumalog Falls quick guide (when open)
Originally, we planned to visit Tumalog Falls, one of Oslob’s most famous waterfalls known for its curtain-like cascades and cool, misty pool, a perfect stop after the whale shark activity. Unfortunately, the falls were temporarily closed for maintenance when we visited, so we decided to head to Sumilon Island instead.
If you’re visiting soon, it’s worth checking with your hotel or locals first, as the falls sometimes close due to weather conditions or safety work. When open, it’s just a 10–15 minute drive from the whale shark area, and you can hire a habal-habal (motorbike) for around ₱50–₱100 per person to get there. Most travellers say it’s a short but refreshing visit perfect for photos and a quick swim under the gentle waterfall.
Sumilon Island sandbar and snorkelling
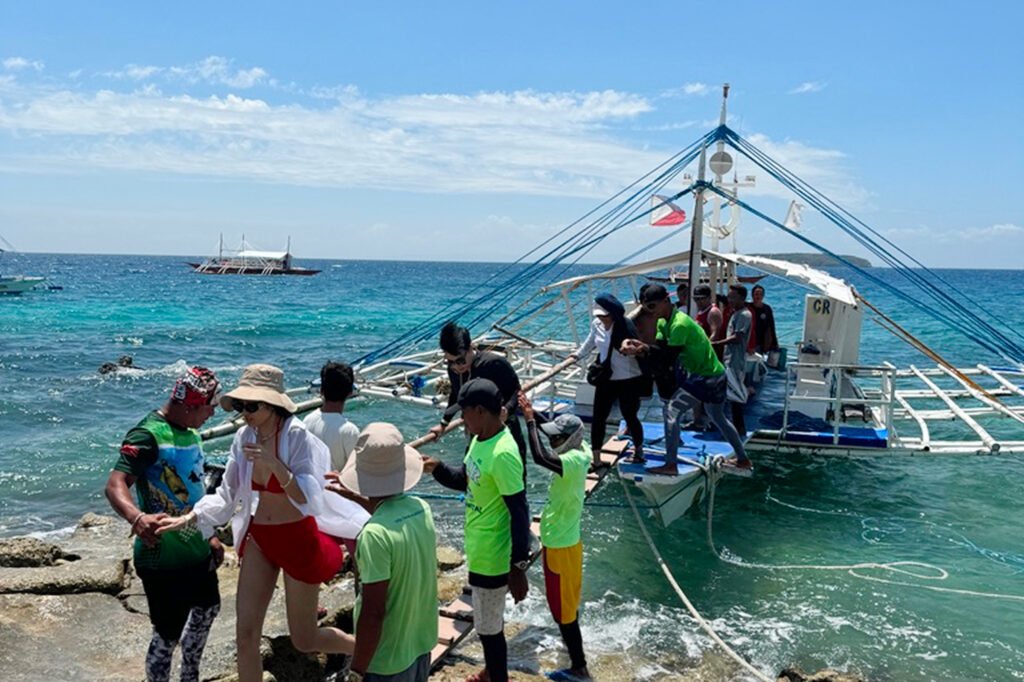
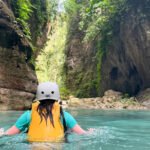
When we realised Tumalog Falls was closed, we asked the receptionist at AJ’s Place to help arrange a Sumilon Island tour. A tricycle picked us up from the guesthouse and dropped us at a small docking area where bangkas depart for the island.
The boat ride to Sumilon takes around 15–20 minutes, but boarding can be a bit of an adventure when the tide is high or the waves are rough. Locals often set up a makeshift “human bridge” of planks and boats to help passengers board, which can feel wobbly and nerve‑racking if you’re carrying heavy bags or travelling with children. Take your time and don’t hesitate to ask the boatmen for assistance.
Once you’re seated, expect a short but bumpy ride with beautiful views of clear, blue water all around. The water at Sumilon’s sandbar is incredibly clear and perfect for snorkelling, with colourful corals and fish just off the beach.
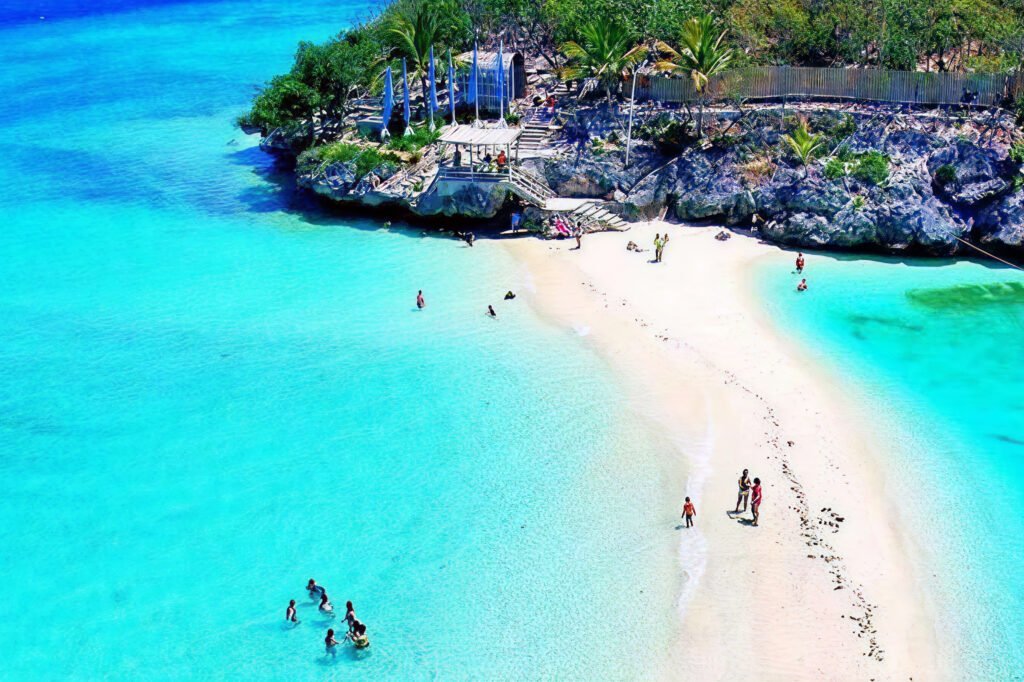
The water was crystal clear perfect for snorkelling with colourful corals and fish.
Sumilon island quick guide:
- Cost: ₱1500+ ₱200 entrance fee (varies by operator)
- Includes round‑trip boat transfers from Oslob area
- Snorkel rental: approx ₱100
- Snorkelling with a guide: around ₱400 per person
Lunch in Oslob
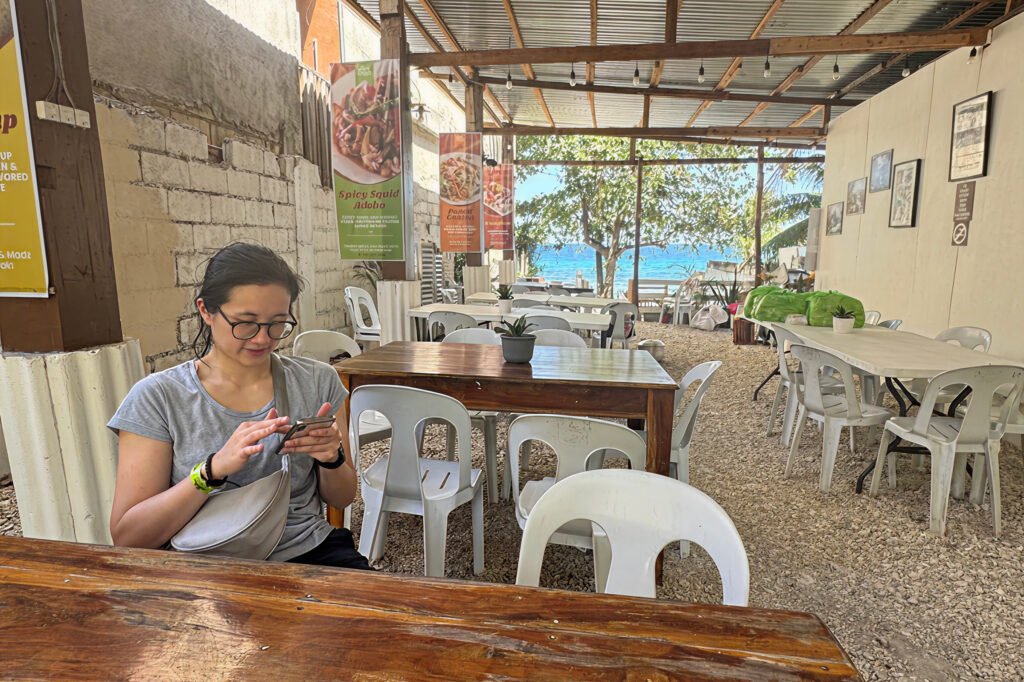
Back in Oslob, we had lunch at Paul & Madz Restaurant, just a 3‑minute walk from AJ’s Place. Portions were generous and the food was decent, though a bit on the salty side – we’d rate it around 6.5/10.
Transfer from Oslob to Moalboal
In the afternoon, we checked out and headed to Moalboal, the base for Kawasan canyoneering and the famous sardine run. We booked a private taxi through our stay for around ₱1500; the drive took about 3 hours. Alternatively, you can take a bus to Bato Terminal and transfer to a Moalboal‑bound bus – it’s cheaper but slower and involves more changes.
We arrived in Moalboal around 16:30 and checked into Turtle Bay Dive Resort for 2 nights. Our seaview room for two nights cost about ₱14,000. The setting is beautiful, with a pool and ocean views, but we found it slightly overpriced for the area. Staff were very friendly and we received a free welcome drink on arrival.
💡 Travel Tip: Activities and transfers booked directly through resorts are often 40–50% more expensive than local agencies along Panagsama Road. For example, airport transfers were around ₱2300 outside vs ₱5000 via the resort.
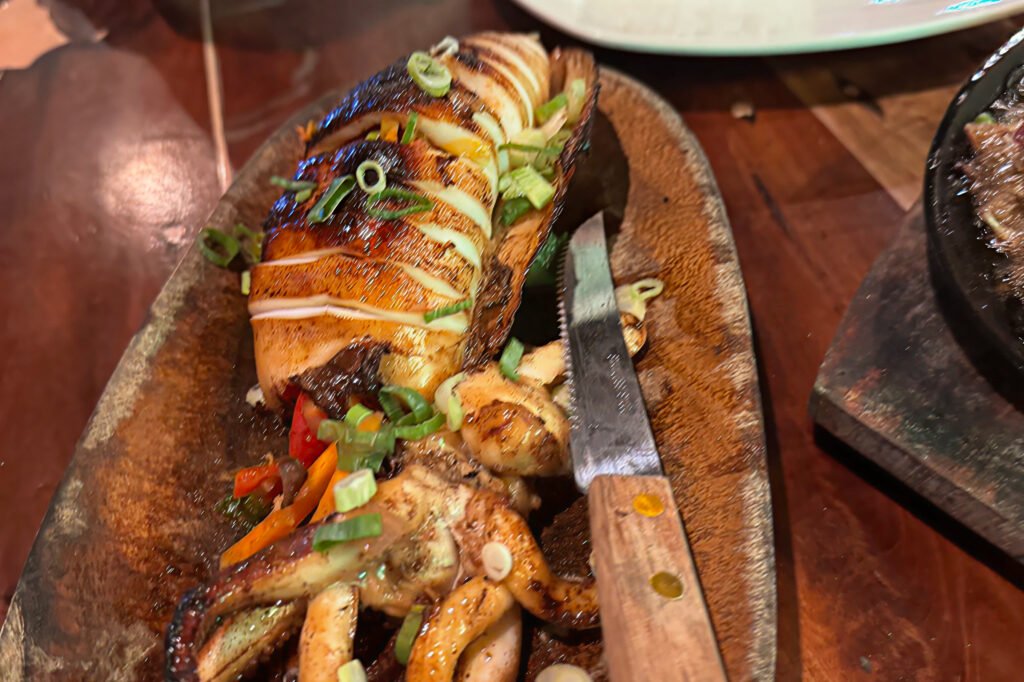
Dinner at Ven’z Kitchen
For dinner, we headed to Ven’z Kitchen near Panagsama Beach, a great spot for local Filipino dishes and vegan options.

Day 3 – Kawasan Canyoneering & Moalboal Sardine Run
We started our third day in Cebu with breakfast at the resort, included in our stay. If you want a more budget‑friendly trip, you could easily stay closer to Panagsama and book everything from there instead.
Kawasan Falls canyoneering: route, jumps and costs
At 08:00, our guide picked us up for a canyoneering tour to Kawasan Falls in Badian, one of Cebu’s most famous adventure activities. We booked through the resort for around ₱3000 per person, which included transfers, safety gear and lunch. If you book with local agencies in Moalboal or along Panagsama Road, prices usually range from ₱1500–₱2000 per person, depending on inclusions.
Our canyoneering day looked roughly like this:
- Transfer from Moalboal to Badian
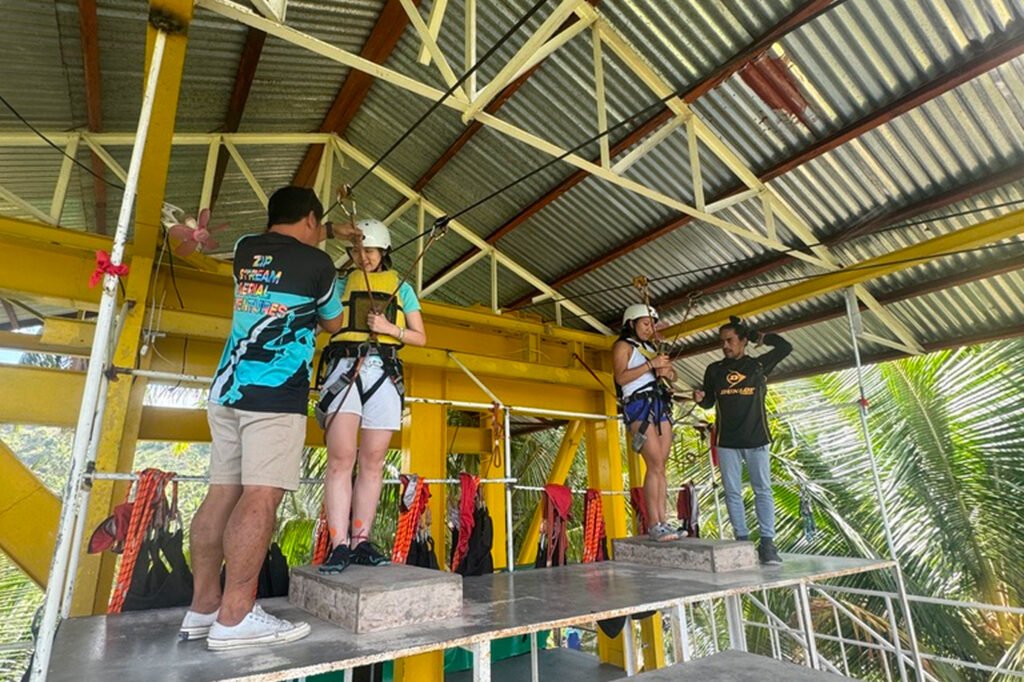
- 35‑minute walk or optional zipline to the starting point (₱600 – I’m scared of heights and still found it manageable and fun)
- Short 10‑minute trek to the river
- Series of 4 cliff jumps, natural rock slides and turquoise pools
- Highest jump around 11 metres (you can skip jumps you’re not comfortable with)
- Total duration about 3 hours in the canyon
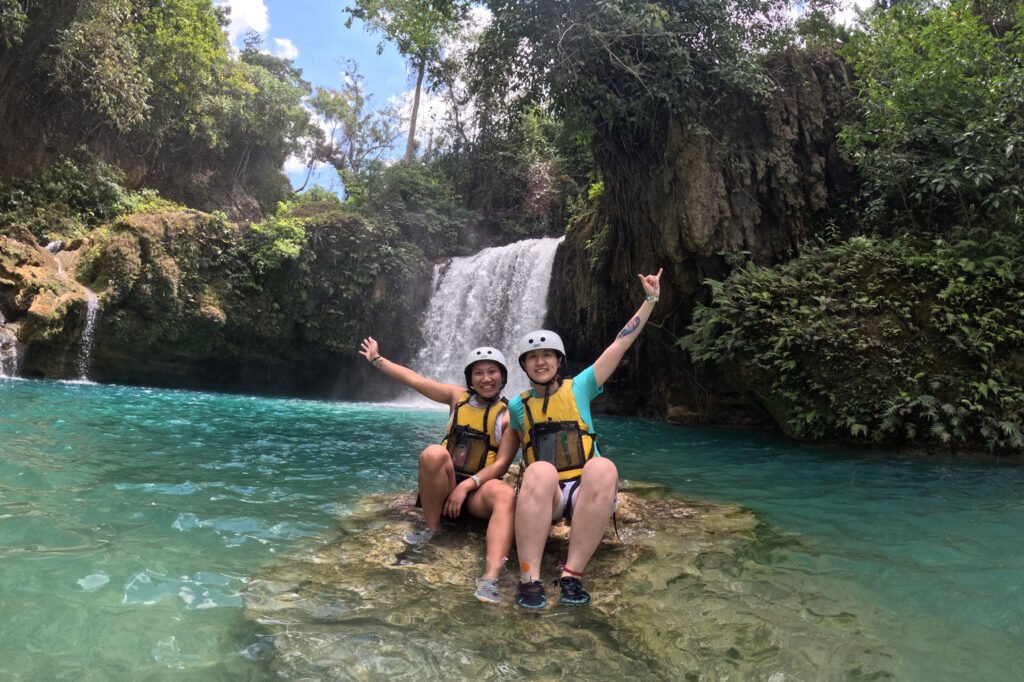
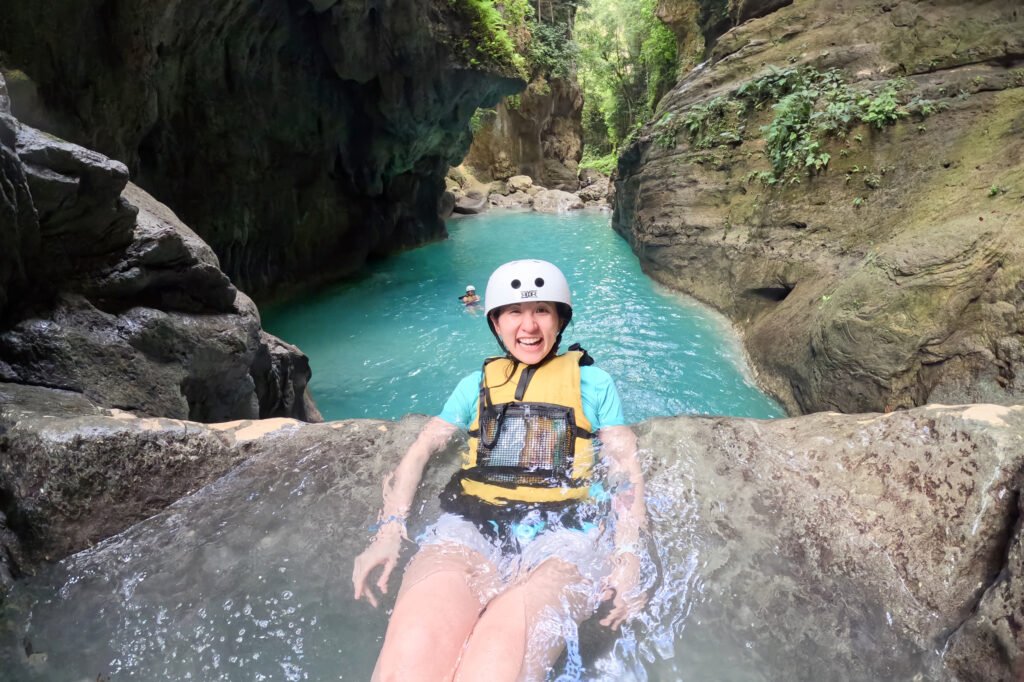

The water here is that classic bright blue you see in photos, and the mix of hiking, sliding, swimming and jumping makes it one of the most memorable adventures in a Cebu 4-day itinerary.
What to pack and wear for canyoneering
- Wear proper water shoes or sturdy sandals with grip.
- Bring a GoPro or waterproof camera, guides are usually happy to carry it and take photos and videos.
- Pack a change of clothes and a small towel for the ride back to Moalboal.
- Check age, health and mobility recommendations if you’re not confident; some tours have restrictions.
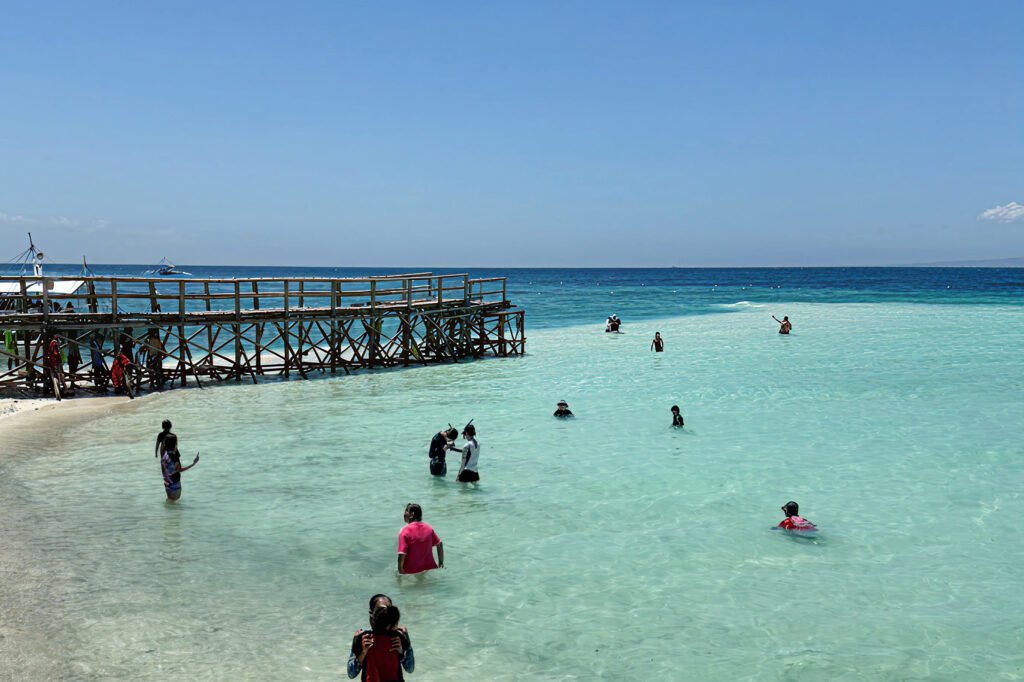
Moalboal sardine run and turtle snorkelling
We got back to the resort around 12:30, grabbed snacks and took some time to relax – midday can be very hot, so it’s a good time to rest by the pool or beach.
Around 15:00, we joined a snorkelling tour from Moalboal to see the famous sardine run and sea turtles near Panagsama Beach. Our tour cost about ₱400 per person with a guide and basic snorkelling gear. We litteraly just walk around Panagsama road and got our guide.
Swimming alongside huge schools of sardines swirling around you, and spotting turtles grazing on the sea grass, is truly magical and easily one of the highlights of this 4 days Cebu itinerary. The reef is very close to shore, so even short tours give you plenty of time in the water.

Ready to book your whale shark tour? Check options here:
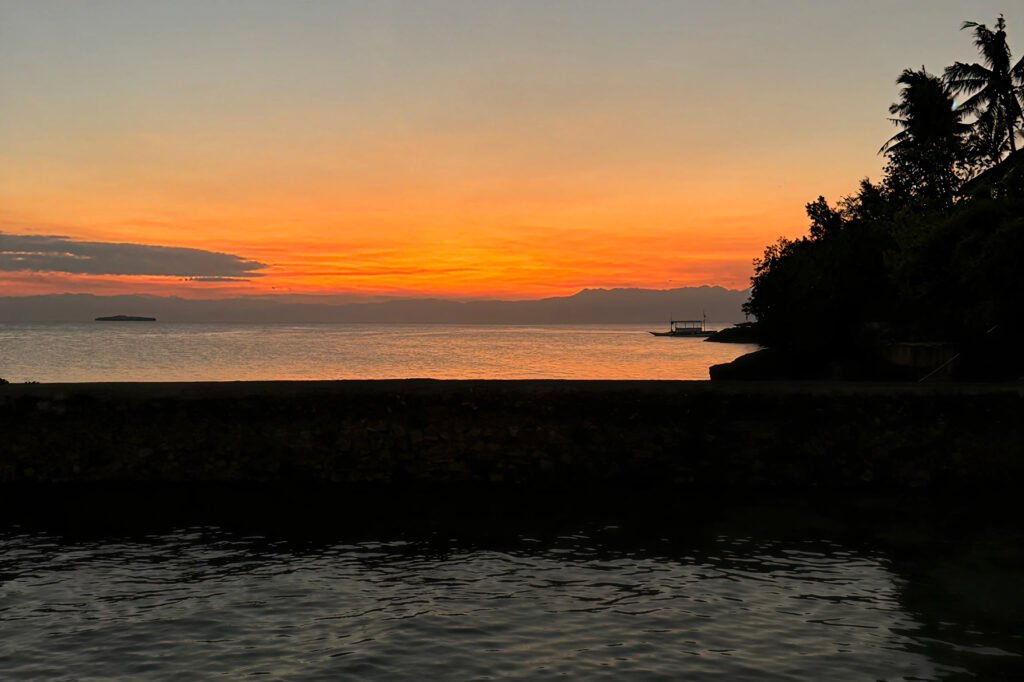
Klook.comIn the evening, we picked up some Korean snacks on the way back to our stay and watched the sunset, a calm end to a very full day of adventure.
Day 4 – Moalboal to Cebu City / Mactan Airport
On our final day, we had an early start for our transfer back to Cebu City and the airport. We booked a private transfer from Moalboal to Mactan Airport for around ₱2300, leaving at 04:30 AM. You can arrange this easily with agencies on Panagsama Road ahead of time; shared vans and buses are also available but will take longer and involve transfers.
💡 Travel Tip: If you need to leave before breakfast, ask your accommodation the day before if they can prepare a packed breakfast. Our resort offered sandwiches, fruit and water to take with us, which was ideal for such an early start.
Cebu Itinerary 4 Days: Costs, packing list & travel Tips
- Best time to visit Cebu: December to May (dry season), when the sea is calm and conditions are best for whale sharks, canyoneering and snorkelling.
- Currency: Philippine Peso (₱).
- SIM/eSIM: Pick up a local SIM at the airport, or use an eSIM like Airalo for easy data.
- Getting around Southern Cebu: Buses, tricycles, habal‑habal and private vans are the main options for this Cebu south itinerary.
- What to bring for this 4 day Cebu itinerary: waterproof phone case, water shoes, reef‑safe sunscreen, light clothes and a dry bag.
Sample budget for 4 days in Cebu
Overall daily budget (excluding international flights):
- Budget: roughly £35–£50 per day
- Mid‑range: roughly £60–£100 per day
Typical costs for this 4‑day Cebu itinerary:
- Accommodation (guesthouse or simple resort): ~£20–£40 per night
- Local food and drinks: ~£10–£20 per day, more if you eat in resorts
- Activities (whale sharks, Sumilon, Tumalog, canyoneering, sardine run): expect a few bigger “activity days” rather than equal daily spend
Ways to save money:
- Use public buses instead of private transfers where possible
- Eat at local carinderias or small restaurants instead of resorts
- Book tours directly in Oslob / along Moalboal’s Panagsama Road instead of through hotels
Where to allow extra budget:
- Kawasan canyoneering (one of the pricier activities)
- Private or last‑minute transfers
- Photos/videos, snorkel rentals and tips for guides
What to pack for whale sharks, canyoneering and snorkelling
Essentials for the water:
- Reef‑safe sunscreen
- Water shoes or sturdy sandals with good grip
- Quick‑dry towel or lightweight microfibre towel
- Dry bag for phone, camera and cash on boats
Clothing to bring:
- 1–2 swimsuits or swim shorts
- Rash guard or T‑shirt you don’t mind getting wet
- Light, breathable clothes for evenings and travel days
- Optional: long‑sleeve top or light cover‑up for sun protection
Gear that’s nice to have (but often rentable):
- Snorkel and mask (or rent locally)
- Waterproof phone case
- GoPro or action camera, plus extra batteries and memory card
Small extras that make life easier:
- Basic first‑aid kit (plasters, painkillers, rehydration salts)
- Any personal medication you need
- Power bank for long travel days
- Copies/screenshots of bookings in case of weak signal
Best time to visit Southern Cebu
Best time to visit Southern Cebu
Ideal months for this 4‑day Cebu itinerary:
- December to May (dry season) for calmer seas and less rain
- Great conditions for whale sharks, canyoneering and snorkelling
Peak season notes:
- Christmas, New Year, Chinese New Year and Easter get busy
- Book popular accommodations and tours earlier during these periods
Shoulder season pros and cons:
- Slightly fewer crowds and often better prices
- Occasional showers, so build a little flexibility into your plans
Rainy/typhoon season (roughly June to November):
- Still possible to enjoy this route, but:
- Higher chance of boat and tour cancellations
- Need to watch local weather updates and stay flexible
Anytime of year tips:
- Plan early starts for whale sharks and canyoneering to avoid midday heat
- Keep one “loose” half‑day in your plan to reshuffle activities if needed
FAQs
Four days is enough time to see the highlights of Southern Cebu, including Oslob whale sharks, Tumalog or Sumilon, Kawasan canyoneering and Moalboal’s sardine run, as long as you’re happy with early starts and a fairly active schedule. If you prefer slower travel or want to add Cebu City sightseeing or Bohol, consider extending to 5 – 7 days.
Technically it’s possible on long day tours, but it makes for a very long and tiring day with early starts and lots of time in the van. Staying overnight in Oslob and Moalboal, as in this 4 day Cebu itinerary, spreads things out and gives you more time to actually enjoy each place.
For whale shark watching in Oslob, you can usually just turn up early and pay on the spot, especially if you’re staying nearby. For Kawasan canyoneering and Moalboal snorkelling tours, it’s easy to book a day or two ahead through your guesthouse or local agencies rather than far in advance online.
Oslob is controversial because whale sharks are fed to keep them close to shore, which can affect their natural behaviour and migration. If you’re concerned, read up on the ethics beforehand and consider alternative destinations in the Philippines where whale sharks aren’t fed and encounters happen more naturally.
Canyoneering at Kawasan is moderately demanding and involves walking on uneven rocks, swimming and optional cliff jumps. Most reasonably fit travellers can do it, but if you have mobility issues or are very uncomfortable in water, it’s better to discuss options with your tour operator or choose a gentler waterfall visit instead.
Southern Cebu is generally considered safe for travellers, including solo visitors, especially on well‑trodden routes like Oslob, Badian and Moalboal. As always, use common sense: avoid flashing valuables, arrange trusted transport, let someone know your plans and check recent reviews for tours and accommodations.


Leave a Reply